CLICK HERE FOR FREE BLOGGER TEMPLATES, LINK BUTTONS AND MORE! »

Valient Viewers of Braver Homes and Gardens

Friday, January 27, 2012

Braver Than Storebought: Chai Latte

I've been wanting to start a new segment called Braver Than Storebought. 

Ever see a food item that's insanely priced and wonder if you could reproduce it cheaper?
Ever taste a food product that looks good, but tastes like barf, and wonder if you could make it better?
Ever make a meal that is marketed as a convenience product and wonder if it's really all that convenient...or even healthy?

These are the questions I'm going to answer in this segment.  I have a whole pile of food items that I've been asking these same questions about.  I'm going to make the storebought version and a homemade version and judge them against a set of criteria and see which one is really "better", "cheaper", or more "convenient".

First up - - Chai Lattes.

First, a funny story.  I was a typical four year old once.  Did dumb things just to see what would happen when I did them.  I was alone in the kitchen and poured some milk without asking Mom.  I thought it might be interesting to see what would happen if I added a little water.  I added some and drank. It still tasted fine.  So I went back to the sink and added more.  Tasted weird.   Went back to the sink (I'm four - so I'm up on a chair which was not allowed in our house, mind you).  This time I had about half the milk gone and filled the glass halfway with water.  Just as I was becoming mesmerized by how milk goes from pure white to tan the more water you add...in walks Daddy.  And of course he sees me at the sink, standing on a chair, filling up my milk with water, with my Mom nowhere in sight and knows in an instant that I'm monkeying around.  And of course, in our house, there was no such thing as wasting food.  Do you know he stood there and made me drink that whole dang glass of watered down milk.  It was the most disgusting thing I've ever tasted. 

It was 30 years later before I could bring myself to try a latte - knowing that they are a half milk/half water mix.  I don't care how good a parent you are - - you will totally mess you kids up somehow. 

DESCRIPTION:  A chai latte is a half-n-half combination of steamed milk and chai tea.  Chai tea is made up of several stiff tasting herbs including cardamom, cloves, and pepper.  The mix is sweetened, thank goodness!

The storebought version is a pre-made chai flavored syrup.  Oregon Chai is the brand sold in my area. 
Most coffee shops also use a boxed chai concentrate when they make your lattes.  "Tea flavoring" is an ingredient.  Not actual tea leaves.  Hmm...

THE RECIPE:  Making your own chai lattes couldn't be easier.  Unless you have a home espresso machine, you do have to settle for warmed milk rather than steamed.  But if you're not a total coffee snob, you know this makes no difference in taste. 

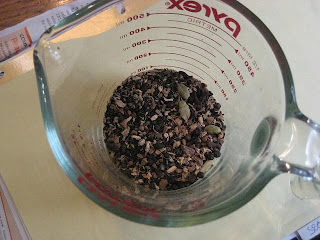
1/2 cup chai tea blend of your choice  (I used Rishi Tea's chai mix. You could also assemble your own mix of the tea leaves  & spices but I didn't want to have to guess at the right ratios of so many variables).


3/4 c sugar (more or less to taste - 3/4 c was sweet but not sickeningly sweet to me)
3 cups water

Put this in a saucepan and bring to just under a boil. 


Turn the heat back down to a simmer for about a minute and stir it to make sure the sugar dissolves.  Turn the heat off and cover it.  Go do a load of laundry or something while the leaves steep.  Pour the tea through a strainer into your storage jug.

(One note.  Tea drinkers know that you can re-brew the same tea leaves at least once and still get a good brew.  I reused my leaves again, as above, but this time adding only 1/2 c sugar and 1-1/2 c water).

The tea in your storage jug is now your chai concentrate.  Don't drink it straight up - - it is hefty.  To make your latte, warm or steam some milk with the chai concentrate in a 50/50 ratio. 

This concentrate keeps incredibly well in the fridge for a looong time.  I made some over a month ago and it's still good. 

EASE FACTOR:

This recipe couldn't be easier.  It takes only minutes to brew the tea. And it's a great make-ahead /cooks while you do something else kind of recipe.  It took no more time and energy than opening up a box of the pre-made mix. 


UNDER AGE 10 FACTOR:

I don't know many kids under 10 that might like to drink chai lattes.  And since this is a stovetop recipe, I don't recommend it for doing it with the kids.

TASTE FACTOR:
I thought this recipe was better than the storebought version.  Every coffee or tea drinker has their own preference levels of sugar & cream.  Making your chai lattes from scratch allows you to make it as sweet or as stiff as you prefer.  I thought the box mix tasted like syrup-milk.  With my version, I could taste the spices.  I could also SMELL them.  The smell of real chai is fan-tastic.  The box concentrate just smells like sugar with a faint "tea" smell. 

Plus you can use REAL sugar, sucant, agave or stevia.  With the box mix you get corn syrup and hydrogenated oils.  Ew! 


COST COMPARISON:

A 32 oz. box of chai concentrate is $5.49 in my area. 
Assuming I use 4 oz. of it per serving I'd get 8 servings.
       That's $0.69/serving

A quart of milk is 1.99 and yields about 16 (4 oz) servings. 
       That's $0.12/serving.

Rishi dried chai mix is $39.99 per pound.  But a half a cup of tea mix is .16 pounds, or 6.39. 
Brewing it twice yields 9 (4 oz) servings. 
      That's $0.71.

CONCLUSION
With the boxed concentrate, one 8 oz. serving costs $0.81.
With the homemade concentrate, one 8 oz serving costs $ 0.83.
Starbucks charges, what?  About $4.00 for the same size!!!!  THAT IS NUTSO!

Costwise, the homemade version is pennies more and you are getting REAL milk, REAL tea, and REAL spices with the sugar level of YOUR choosing.  That's worth two cents more, right?? 

Plus, I am not kidding when I tell you I've kept my concentrate around for over a montha and it's still good.  You can brew up a huge batch and have it whenever you want.
Tuesday, January 24, 2012

Pshaw! I Can Do That - Fleece Hood

Ever see something in a catalog or in the stores and think, "Pfft!  I can make that myself!!"  I think that all the time.  For me to copy something, though, one of two criteria need to be met:  I either have to be able to make it cheaper or make it better. 

Today's shameless copy job is the 4-In-1 Fleece Hood originally spotted at http://www.lakeside.com/. Here's the catalog clipping:

There's no way to make these any cheaper.  At an average of $9/yard for fleece, you need about 5/8 of a yard.  When I add in the elastic & lock for the hood, I'd actually spend more than the catalog charges.

But I can definately make one better!  I have mixed feelings about fleece, which I will save for a future rant another post.  One of the downsides is that it is NOT WINDPROOF which does me no good here in wintery Wisconsin.  My plan to make a better hood is to line it with another layer of fleece.  Wanna make one?  Here's how:

SUPPLIES:  * About 5/8 yard of two pieces of fleece (I used yellow for the lining and a paw print for the outside).  *About 30" of cord elastic.  *One cord stop for looped cords. 

In the center circle of the catalog picture, they basically show you the shape of the hood.  I cut two pieces, freehand style, of yellow and two pieces of the paw prints.  I HATE HATE HATE getting drafts down my neck so I made mine long, at 27 inches.  You could make yours shorter if you don't like as much bulk around your neck.

The lower width is 15 inches and the lip for the hood sticks out 1-1/2 inches.


1.  On the long edge (the one without the lip) of the outer pieces, sew from the bottom all the way around the curve.  Do the same on the lining fabric. 

2.  Trim your seams close to the stitching like this:


3.  Put the outer and lining pieces together, right sides together and match up the seam at the top.  Pin it in place and sew the lips together, with no more than a 1/2" seam.  Again, trim the seam close to the stitching.

4.  This is where it gets weird.  Open it up and lay it like how I've got it in this next picture, right sides together.  Now, if we think of this as a "U", the entire underside of the U should be sew together and the outer fabric & lining fabric should be connected like they're kissing. 

5a.  Now, if we think of this as a pair of pants, you want to pin the inner legs and crotch together but....


 5b.  Mark the very inner curve in such a way that you'll remember to leave a half-inch on either side of the point where the outside and lining meet up.  I use two pins close together to remind myself to stop stitching. 


6.  Sew the "legs" of the "pants" together, remembering to leave that half inch free on either side of the lip seam.  Trim the seams as before.  Flip the whole thing right side out.  Here's the little opening that I left.  This is where the casing opens for your elastic. 

And this is what it should look like at this point.  Couldn't flip it right side out?  Perhaps you sewed the bottom shut.  You weren't supposed to do that yet! 

7.  Now make the casing.  To do that, you sew around the hood opening in about a 1" seam allowance.   Finger press the seam as you sew to keep the edges tidy.  You can see in this picture that I've allowed enough on the right edge so my needle overshoots that little hole.  And I'm finger pressing the edge in such a way that the white won't curl to the inside and look yucky. 

8.  You're in the home stretch!  Position your bottom neatly and sew the two bottom hems together.   I trimmed an inch off the lining so that it wouldn't poke out from the bottom (like a slip showing).  One of the upsides to fleece is that it doesn't ravel so, no need for a formal hem.  :)

Here's how my bottom edge looked:

9.  Now we're going to run the elastic through the casing.  The elastic will needs to form a loop and I know that my elastic is not going to stay put in a knot as is.  Corded elastic will also unravel.  So I took a match and burnt each edge to seal the nylon.....


 like so:


10.  Pin one edge of the elastic onto the hood.  Use a second safety pin (closed, of course) to run the other end all the way through the casing. 

 11.  Take the safety pin off (leave the other end pinned onto th hood for now).  Run your cord stop as in the picture below and shift it to the cording's center point. 


12. Now go ahead and knot the edges...and then run a match around the knot which will melt the knot into place and keep it from undoing itself.


13.  Shimmy the cording so that the knot goes up about midway into the casing to hid it.  My finger is pointing to where I've shifted my knot. 
The cord stop should be front and center.   And boom, you're done. 


So, according to the catalog, I can get four looks outta this thing.  Let's double check:

Neck warmer:  Check

SIDENOTE:  I wish to clarify that I went out of my way to iron this shirt just for the photo shoot.  That line across my chest is from water that dripped out of my iron - it is NOT a stain. 

Partial face mask:  Check

Open faced hood:  Check

Full head & face mask:  Check.

I already know that this is BETTER than the catalog.  I got superwarm just taking the pictures.  I almost wish it would snow so I could try it out while I shovel.   

I'm linking this to Heidi's UFO Roll Call party found HERE.

Monday, January 16, 2012

Post-Christmas Discovery

I just finished cleaning up the last of the Christmas stuff.  I got a late gift from The Conductor's mom, which he brought home from his post-holiday visit.


Yum!!  A bag full of homemade goodies. Two kinds of chocolate covered pretzels and a tin chock full of these:
I liked the ones in the upper right with the chocolate drizzle the best!

The Conductor also got a set plus a few bags more of other treats.  We're working on the second tin and they're still just as fresh as when he brought it all home. 

Some wedding fun was also in the bag.  The Conductor's mom has a tradition of making treats for table favors for all of the family weddings and she made me some samples:


A white chocolate, a dark chocolate and a minty white.  Mmm! 

We tend to eat dessert in front of the TV so I had left the whole gift bag right on the coffee table. Of course, I save "good" bags to reuse again!  As we finished up the contents of my bag, I was just about to fold it up and stash it away. 

But then what did I spy.....with my little eye?


Ho-lee-cow!!!  There are BEADS inside the handles of the bag!!!  They were loose inside the plastic handles, just waiting to be repurposed.

Of course I ripped them right off. 

Then I felt bad for destroying a "good" bag - so I used my punching tool to punch out a ton of gift tags for next year.


 The Conductor was next to me on the couch and he was urtterly fascinated by the fact that there's a tool out there to make gift tags.  He said to me, with total seriousness, "Wow.  You are *really* going to keep us in line when we're married."
Damn straight!

Anyway, in the post-holiday clearance sales, I picked up this earring set for $2.  I set the studs aside for my sisters since I don't wear earings.


What I really wanted were these earrings.  After removing the hooks, I had two matching charms which I ran jump rings through than strung up with the beads from the bag...


 ...to make this cute little necklace/bracelet combo:

I only had half-enough beads from the bag to make the bracelet.  Fortunately I had some loose red ones in  my stash that gave me enough length. 

Too cute, hey?  I'm almost sorry Christmas is over because I'll have to wait a whole year to wear these.


And now a fun wedding update:  We're gearing up to send out save the date cards.  I went to the post office and asked for wedding themed stamps.  The guy said they had a ton in the back.  After a while, he came back in and said he's not allowed to sell those.  Um.  Ok...  So I said, "Well do you have anything pretty - flowers, hearts, anything like that?"

He says, "We're doing our stamp audit now so the only stamps I'm allowed to sell are these with the pretty American flag on them"

Seriously?  A stamp audit?  And isn't that ironic - that an AUDIT would hold up me - an accountant - from having pretty stamps on my first wedding mailing?  Ugh! 

Tuesday, January 3, 2012

Dear Margaret

Who visited you this past holiday season?  My Gramma Helen passed away about three years ago but she visited me on and off over the holidays.

It started in the two days leading up to my vacation from work.  I'd get in my car - once at work, once in a store lot, and I would smell cigarette smoke.  I'm not a smoker.  I don't allow smoking in my car.  And it's winter time in Wisconsin so it's not like I had my windows down and was catching a whiff from a smoker in another car.

One of the last times my Gramma and I did anything together was when I drove her in my car to go visit my Grampa in the hospital. 

Photo credit

Three days into my vacation, I was working on a project where I needed to trace something petal shaped to make a pattern.  I couldn't think of a thing in my house to trace.  Then I turned around and looked up and there they were.


My gramma's black patent leather old lady shoes!  I used to put these on all the time whenI was a little kid.  I couldn't wait for the day when my feet would be big enough to wear them.  They were the one thing of hers I absolutely had to have after she passed away.  And the front was perfect for the petal shape I  needed to trace.

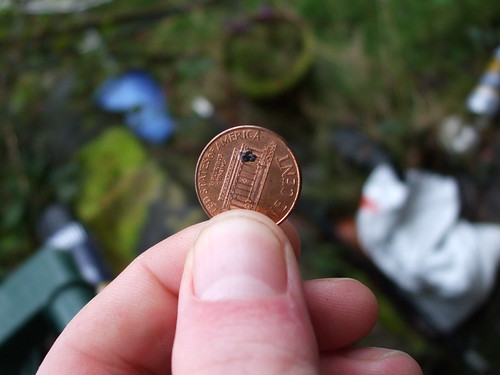
About five days later, I told the Conductor about the smoke in the car and the shoes as we drove to dinner.  After dinner, as we were geetting up to leave, I looked down at the orangey carpeting and found a penny.


Photo Credit


And you know what they say about finding a penny on the ground - it's a penny from someone in Heaven who's thinking of you.

The next day, I set about sorting out a huge box of papers of my grandfather's.  Inside it, I found a notebook opened to a page that simply said:

I flipped to the next page and found that my Gram had made carbon copies of several letters that she wrote to my Aunt Margaret from 2001-2002.  It was so fun reading them over the next few days.  Some parts sounded exactly like how she talked - I could amost hear her laughing and see her facial expressions.  Other parts were surprising - like when she'd close a letter with "consider yourself hugged" or "hugs and kisses".  My Gram never talked like that in real life. 


One thing she prided herself on was her beautiful handwriting. She even named her kids -Michael, Margaret, Louis, and Laura because she said "L" and "M" were the two prettiest letters to write.


Her last visit to me was on New Year's Eve. The Conductor and I ate at a French restaurant.  Each time we've been there, they have a guitarist who plays background music.  He mixes it up everytime.  Sometimes some jazz, sometimes some standards.  Once two ladies were there with a baby and he came and played "Twinkle, Twinkle Little Star" and "Braham's Lullaby" for the baby. 

The guitarist was there again for New Year's.  He was playing quietly as background music and he was in a different room.  The place was packed and noisy with conversation. Yet I heard the music.  At first I thought I was hearing things.  It was New Years...a French restaurant...everyone dolled up...and absoluately no one in uniform was in the place.  But sure enough. the tune came out..."from the halls of Montezuma to the shores of Tripoli...".

He was playing the Marine's song!  The first song I ever learned how to sing.  Gramma used to sit me on her kitchen table when I was a toddler and sing it to me over and over until I could sing it back.  She must've whispered in his ear and requested it just for me. 

Who visited you this holiday season?  Did you let them in or did you think it was your imagination?  We miss those who have passed on the holidays...I think sometimes they miss us, too. 


Sunday, January 1, 2012

Happy New Year!

I am so jazzed!  Not because it's 2012...but because my New Year's Eve dress turned out to be a smashing success!

I used my newly padded dress model, Grace, for the first time and, let me just say, "Wow, wow, wow!"  What a huge difference a proper dress model makes! 

No more winging it.  No more "I'll just make one size bigger and hope for the best."  No more "It was cheap fabric anyway so it's OK if it fails."  No more "maybe no one will notice that it doesn't fit right."  Check this out:


This is Grace trying on the bodice.  It's supposed to be a sleeveless halter top look.  So I can see, in an instant, that I needed to add some bust darts on the side with he way it's poking out.  And that was just the start of how instrumental Grace was, now that she's all padded out. 

When all was said and done, my dress turned out perfectly.  I was practically dancing when I realized it was going to be a success.  I can't tell you how long it's been since I had a party dress turn out perfectly.  

I used Butterick 4919 shown here.  It's a vintage reprint of a 1953 pattern and is a mock halter top.  The top is actually fastened to the skirt and a hidden band goes around your back then the wraps swing around the front.  I used royal blue fabric with tiny gold dots all over it. I've had the piece in my stash for about 15 years.

It was super easy to do - I finished it in a weekend.  I also wanted to use this dress to try out two techniques that I've never done before that I'm expecting to incorporate into the wedding dress I'm making.  I'd rather screw up on a party dress than on the real deal. 

The first technique was to add a waist stay. You basically sew a sturdy ribbon on the seam of the waist.  It adds stability which is great because full skirts, like the kind in vintage dresses, can be HEAVY and the waist stay keeps the skirt from pulling on the seam and also lessens wear on the zipper. 

I used a very well writen tutorial by the Sewaholic found here. A waist stay can be tied, but she suggested sewing a bra hook to one end and and a loop on the other, which I chose to do, like so:

The second technique was to use horsehair to make the hem.  Horsehair hems always intimidated me but this was incredibly easy.  I used Gertie's directions, found here and it took all of 10 minutes, if that.  Holy man!  What a difference the horsehair makes.  Three years I worked in a fabric store - I knew every notion, every piece of fabric, every button.  I've been sewing for 18 years. And I never discovered horsehair until now. 

Let me tell you - for full circle skirts, you will never get the smooth hem that you get with horsehair.  I think I've found my new drug. 

You can take the waist stay and the horsehair hem and file them both under "what the heck took me so long!".

I also decided it would be wise to add a lingerie stay on each sleeve - these are another brilliant discovery and it should insult every woman out there that clothing manufacturers skip these so often:


I tried it on one last time and I almost cried at how perfect a fit it was.  It totally gave me the guts to wear shoes that do NOT match - my Dorthy Wizard of Oz shoes, also vintage.  (I'm an accountant, it's hard for me to not be matchy-matchy, as Michael Kors always says).
Anyway, the end result was this:


And of course I had to do the "double check your deoderant" pose, like the model on the pattern envelope.

The Conductor was kind enough to delay dinner so I could take pictures before the dress got wrinkled.  Here's how the conversation went:

Me.:  Can you get a shot of the lingerie stay?
Him:  Ok.  What's a lingerie stay?

Me:  Get the horsehair hem
Him:  Ok.  What's horsehair hem?
Me:  Oh, and also get the crinoline in the shot.  And my shoes.
Him:  Ok. What's a crinoline.

He's awesome in his boy-ness, isn't he?  He reminds me of the man that walked into the fabric store I worked at and came up to me and said, "Uh...yea....uh...do you guys have any, um...cloth...here?"

And he was totally serious.... 

Horsehair hem, my first self-made crinoline, and my Dorothy shoes.

After taking pictures of things he knew nothing about, The Conductor took me to Chez Jacques for French food and lousy service.  Despite the fact that they were booked for New Year's they had their B-Team working.  The hostess was obvsiously new and seated us right by the kitchen door.

And I thought, "Little girl, when a lady sails in on a cloud after making a beautiful frock like the kind *I* am wearing that fits perfectly, that got high praise from her finace, and that looks totally awesome with her vintage pantent leather red shoes, you do NOT seat her by the kitchen". 

I asked to be moved.  Ugh.  Later, a charming looking lesbian couple walked in and got stuck with that table since it was the only one open.  They both eyed me and my dress as I went to the ladies room.  I briefly wondered if they'd each get mad at the other for staring at me and my dress.  And then I realized I didn't care - - they were STARING AT MY DRESS. 

When I walked into the restroom, two girls were jabbering in the ladies room and one of them said "....and then I told her that Estelle wasn't going to - - oh my gosh I just love your dress it's so cute where did you get it oh wow Tracy look at her dress it's so pretty..."   Wow!!!

And then I got to stare at this handsome fellow during dinner (which was cold and which I had to send back and which the waitress barely apologized for). 


After, we went to the movies to see The Girl with the Dragon Tattoo and ended up missing midnight because the movie didn't end until 12:30.  But that's ok because all over the theater people were looking at my dress.  Granted, they may have been thinking, "wow, that girl sure is overdressed for the movies".  But I didn't care.  I felt like a million bucks. 

So here's one last shot of the Conductor and I, doing our cheesy 1953 couple pose to go with my 1953 party frock.  Look how nice it poufs out with the crinoline underneath!


Happy New Year!